Mapping audacity "Mel" to MFCC parameters

Regarding my doorbell project.

I managed to see in the “Mel” spectral view of audacity clear bands when the bell is ringing:
Note that I have set the upper limit to 9500 Herz as some clear bands were visible below that frequency.

The problem is that I don’t see the same pattern when using the MFCC block for the same audio fragment (ring.01.1dof4s5r):

Any idea how I should change the MFCC parameters or which MFCC parameters I should change.

FYI my audacity spectogram settings:
image

Your window size is much lower in Edge Impulse, and I think the number of coefficients is a lot lower too. Good to make it run on device, but if you need this fine-grained spectrograms then upping these would probably help.

1 Like

FYI the audio recording I have used.

It would already be a starting point to see at least some difference during the first halve when the doorbell is not ringing and the 2nd halve when the doorbell is ringing.
For the moment both periods are indistinguishable on the MFCC spectogram.

The audio fragment I am using =

@aureleq Could you take a look at this? ^

Thanks for any support , something doesn’t look right.

I would expect to see at least a clear difference between the period the bell doesn’t ring and when it rings (as I can clearly see in the audacity mel spectogram).
FYI I already did some quick training but it classified everything as “ring”. I think this is because the issue I am having with the MFCC block that is not generating usable features for training the NN.

Hi @janvda,

I’m not an expert in Audacity but looking at their spectrogram documentation (https://manual.audacityteam.org/man/spectrogram_settings.html), this is just a frequency domain view with ‘Mel scale’ (voice frequencies are expanded on the y-axis).
Our DSP results display Cepstral Coefficients so it is difficult to make a link with the Audacity spectrogram.
I will play a bit with your .wav file and see if I can extract different coefficients between the beginning and the end of it.

Aurelien

1 Like

Thanks, you are fully right. I understand that it might be difficult or impossible to link the Audacity spectogram parameters with the MFCC parameters.

That is excellent. That is indeed the most important part I think.

Note that once I know MFCC parameters that give visibly distinct coefficients for “ring” <=> “no ring” sound then I will crop my “ring” recordings to the part the doorbell is effectively ringing, I will also reduce the training window size to 100ms (as doorbell rings can be very short - well below 1 sec).

Is the audio fragment correct? When I listen to it, it is mostly white noise except for a slightly higher pitch the last 200ms. Would you have a longer sample maybe?

Hi @aurel

The audio fragment is correct but it only contained the ring sound at the end.

Here another example (ring 2)

… and its audacity spectogram:

so this one covers more than 300ms bell ringing (from 0.45 sec till 0.8 sec).

Here another example (ring 3)

… and its audacity spectogram:


so this one starts with a ring that is fading at the end of the recording.

Thanks for the new samples I can distinguish better.
From my quick experiments you should be fine using the default MFCC parameters.
I used a 150ms window size and 50ms window increase, here are the DSP results on ring02.wav:

No ring:

Ring:

We can observe differences so the Neural Network should manage it well too.
When importing your samples, make sure they contain either only ring or no ring at all. Audacity may be your best bet until we release our editing tool.

Aurelien

1 Like

@aurel, thanks for your support.

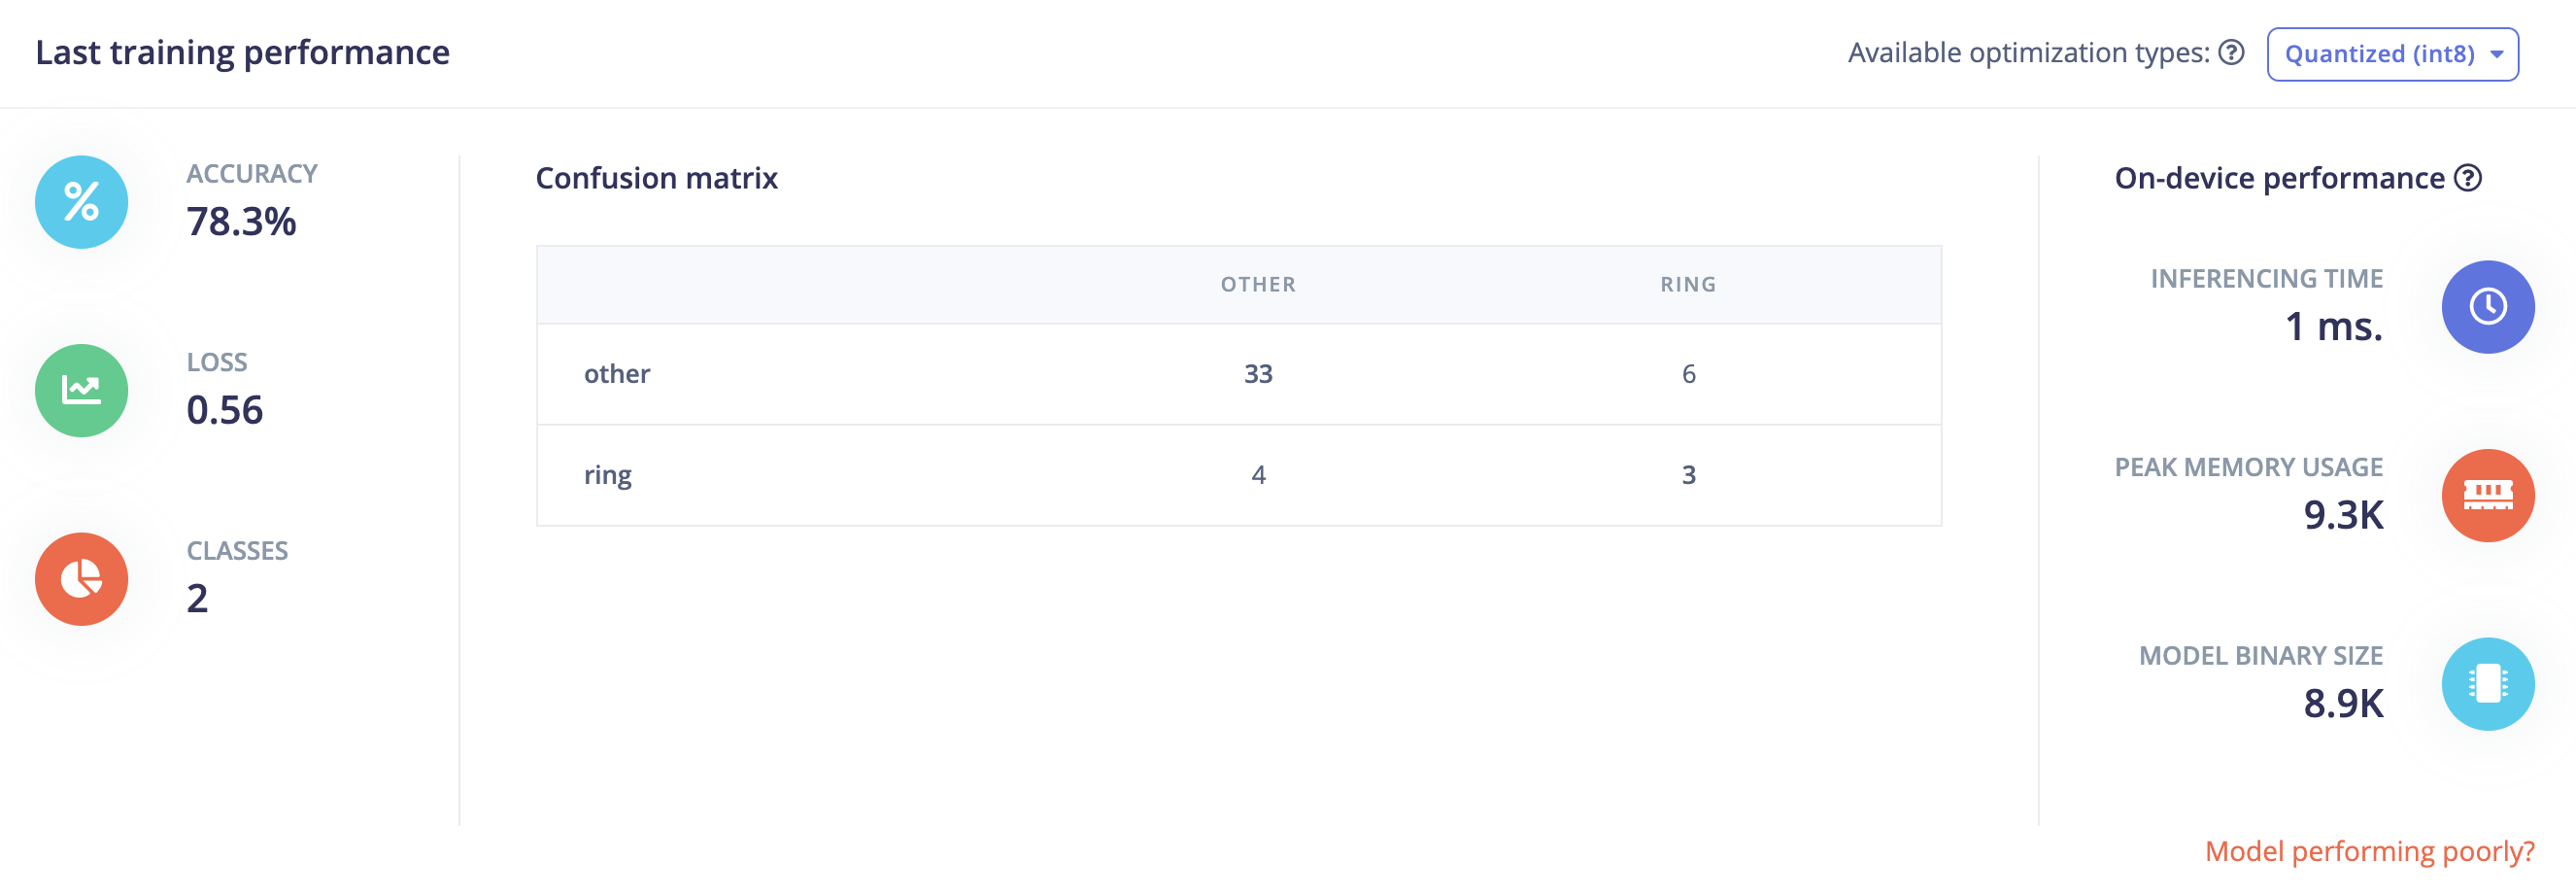
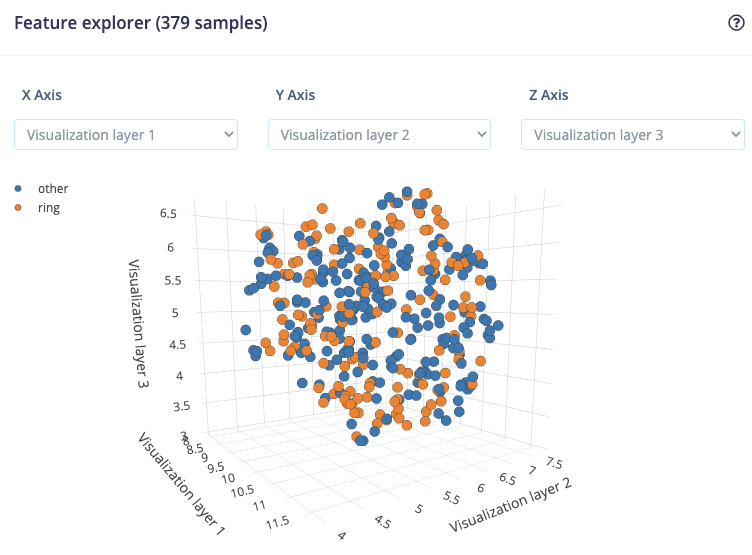
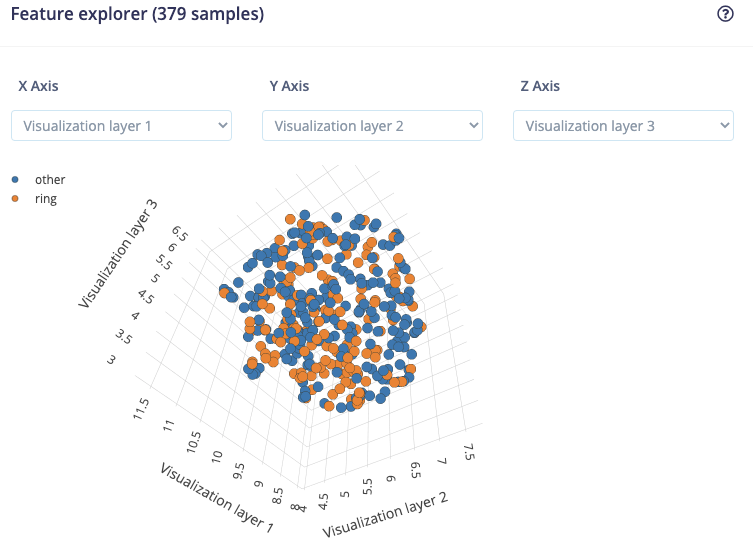
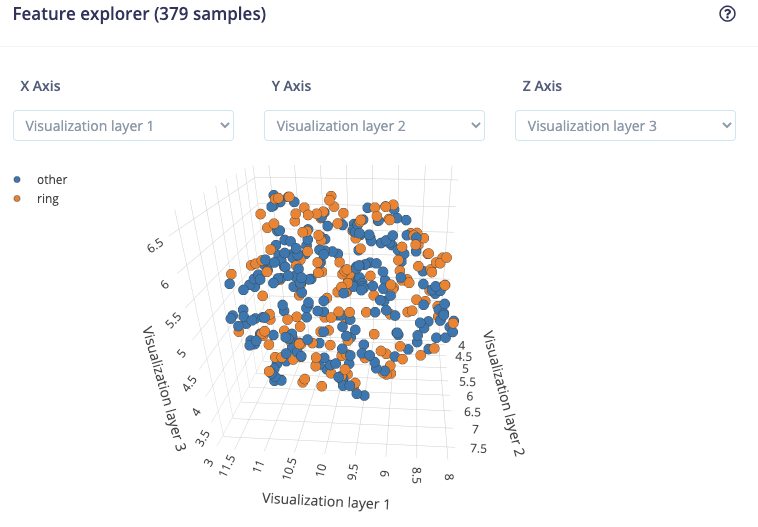
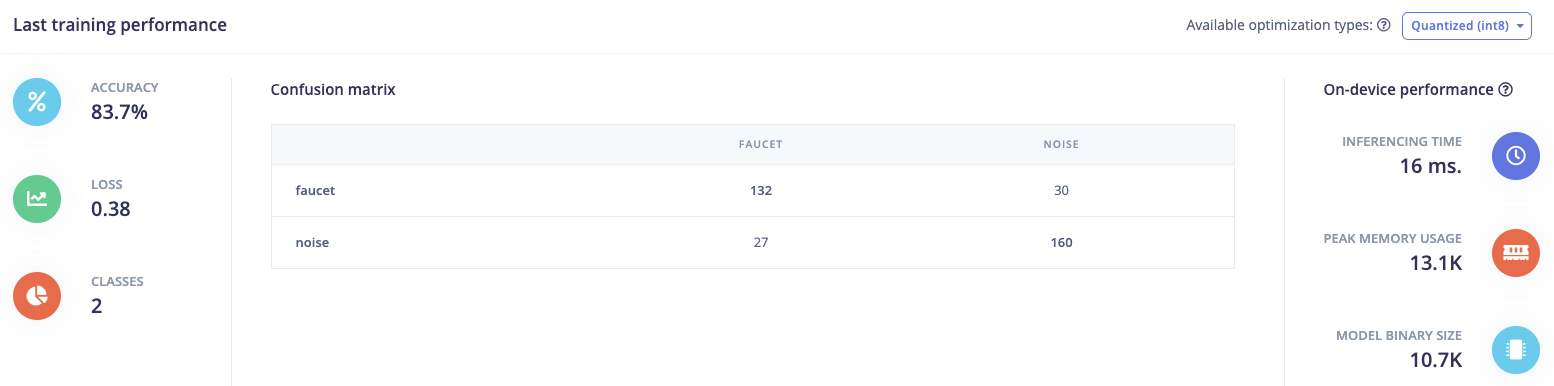
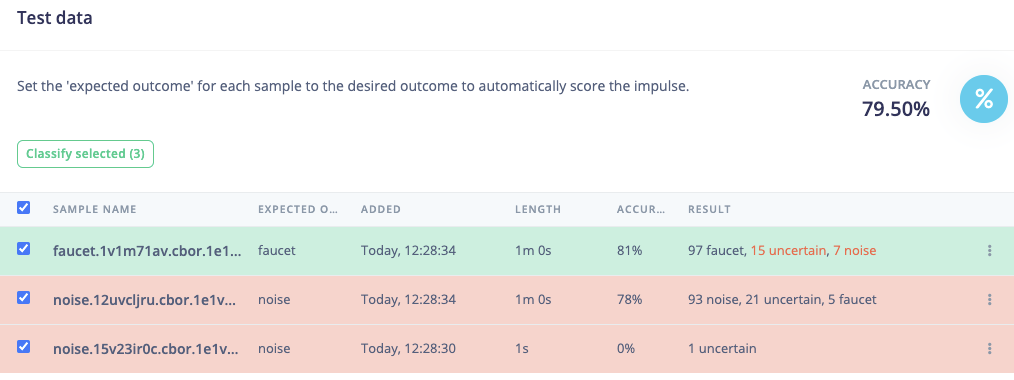
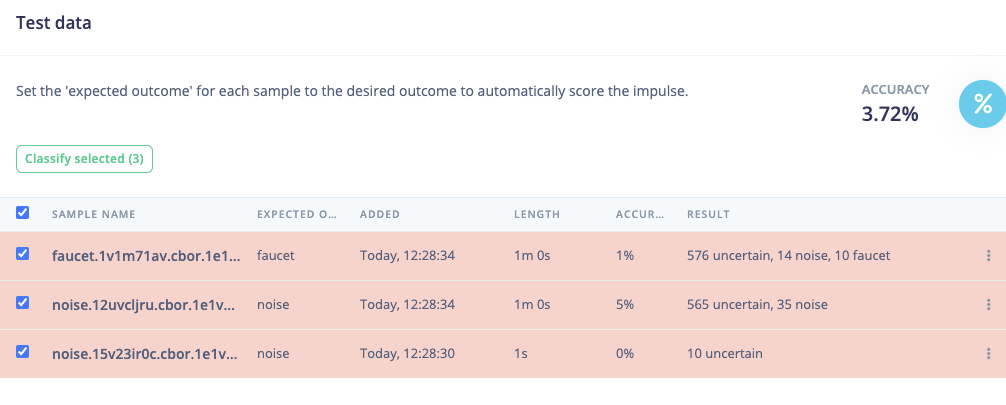
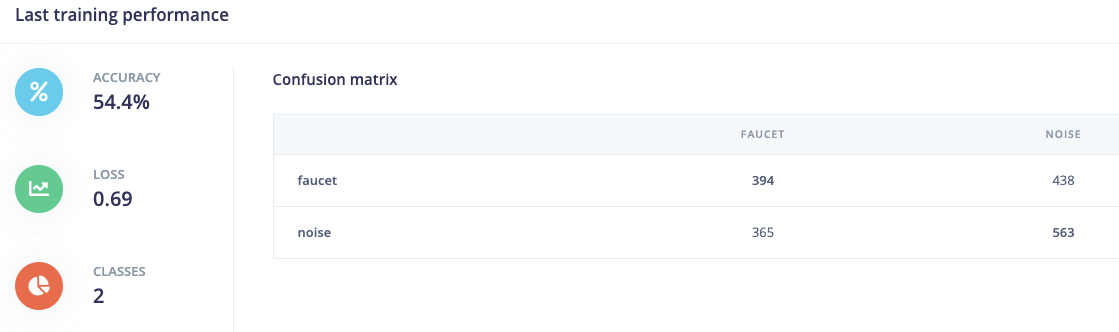
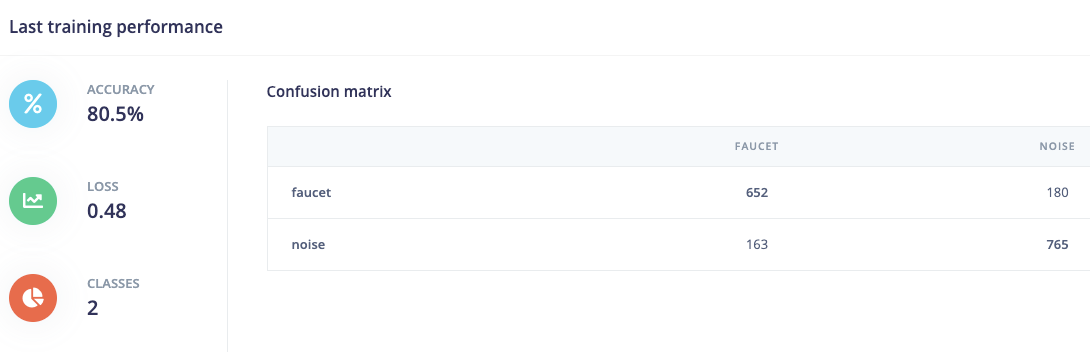
I managed to train a NN but the results are not really good. According to the confusion matrix it is classifying more than halve of the rings as “other”.

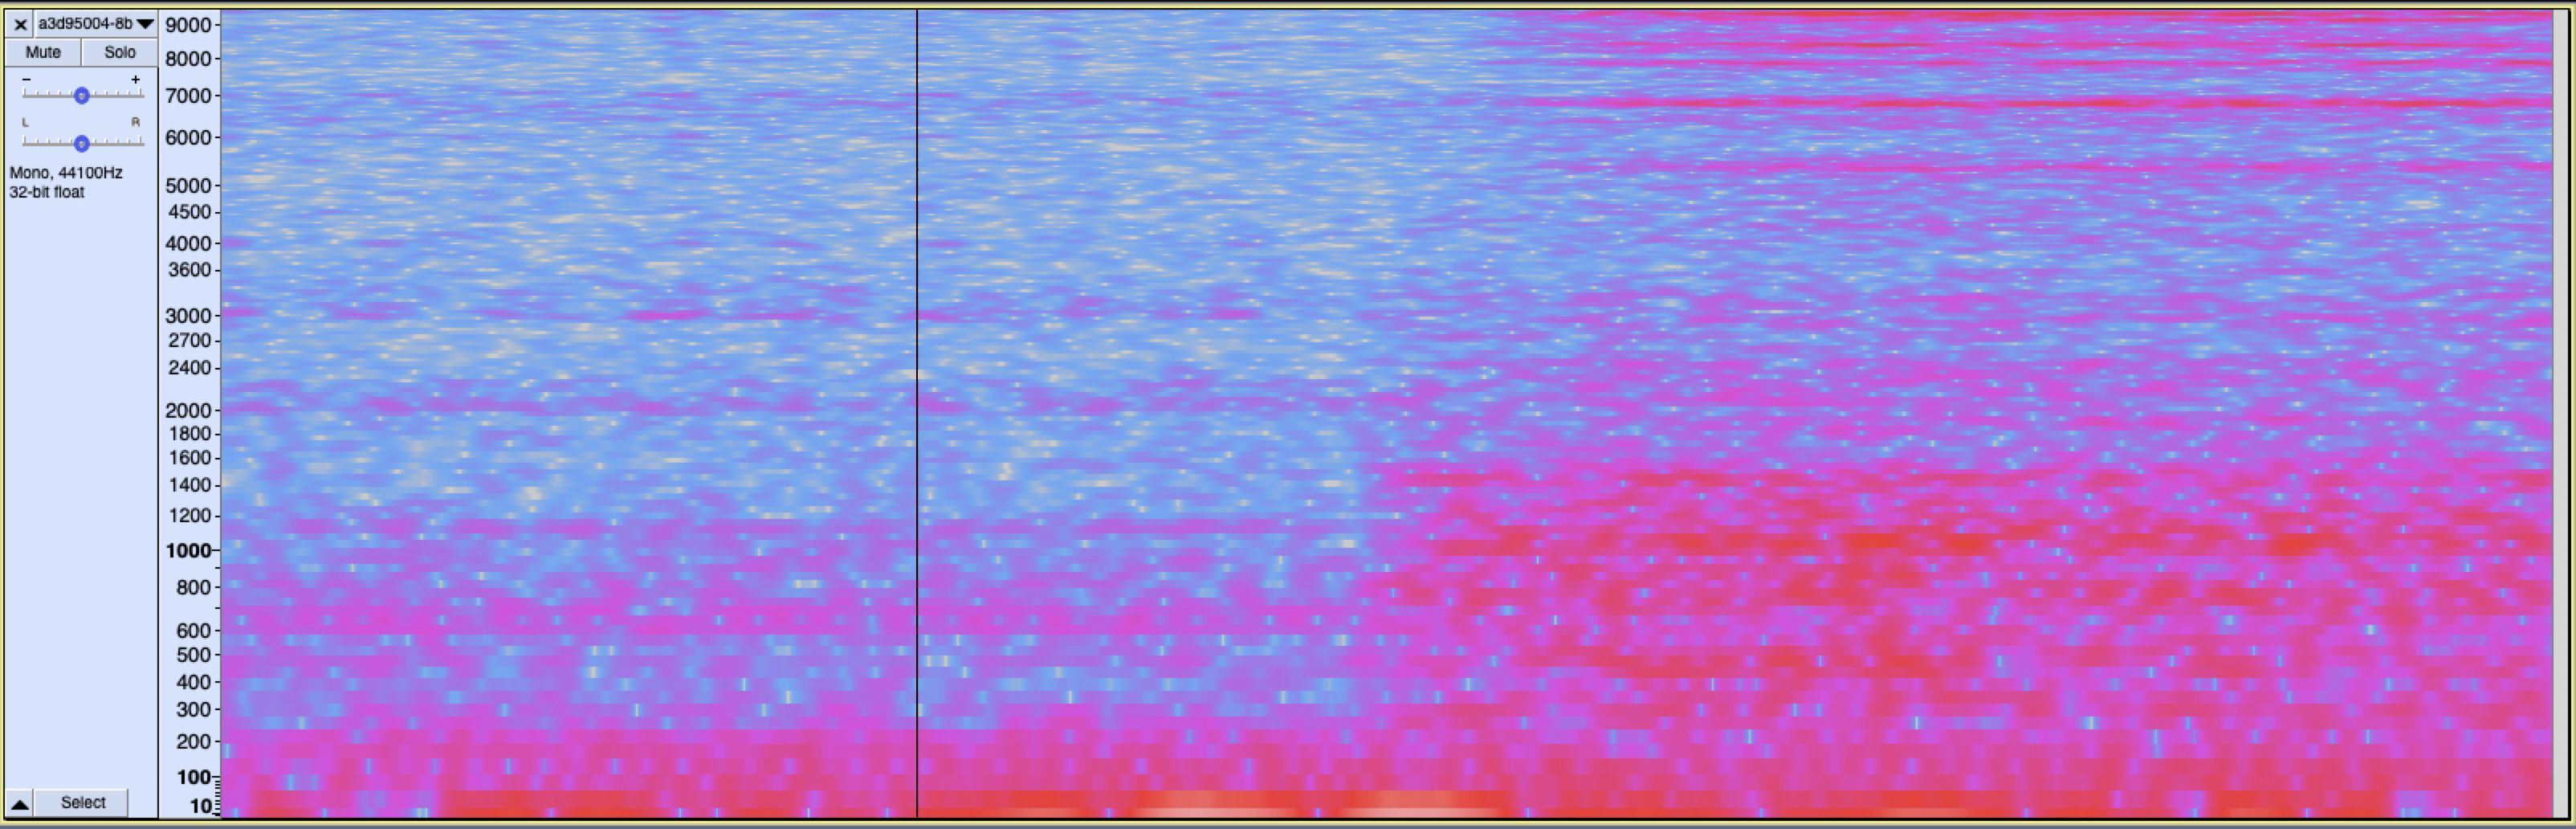
I am still thinking that there is problem with the input for the NN.

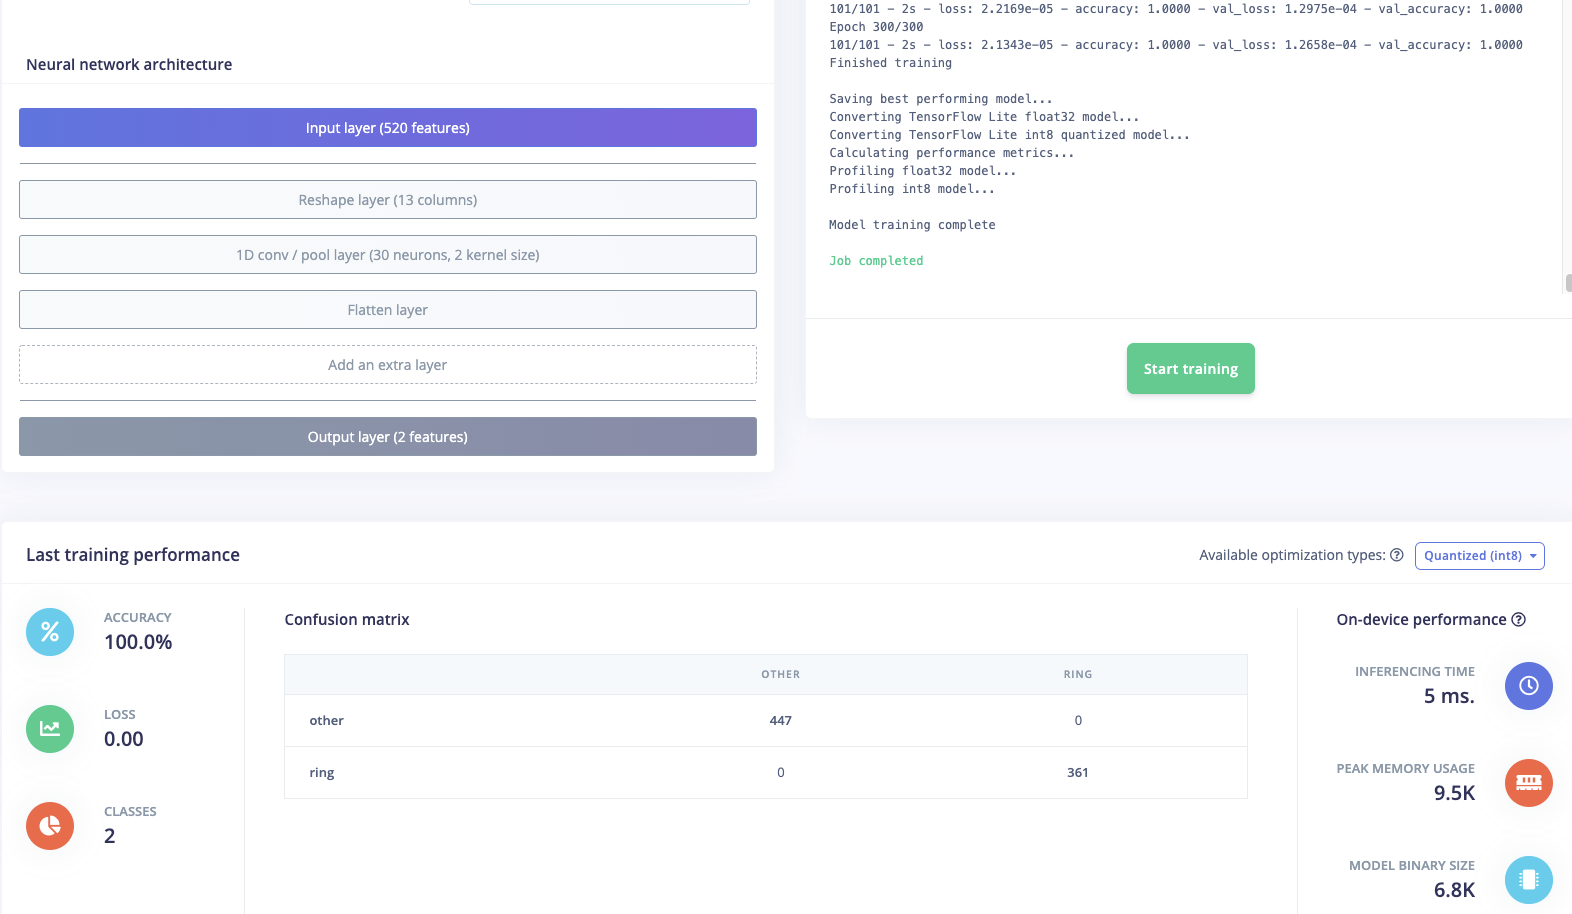
The Details of the NN training:

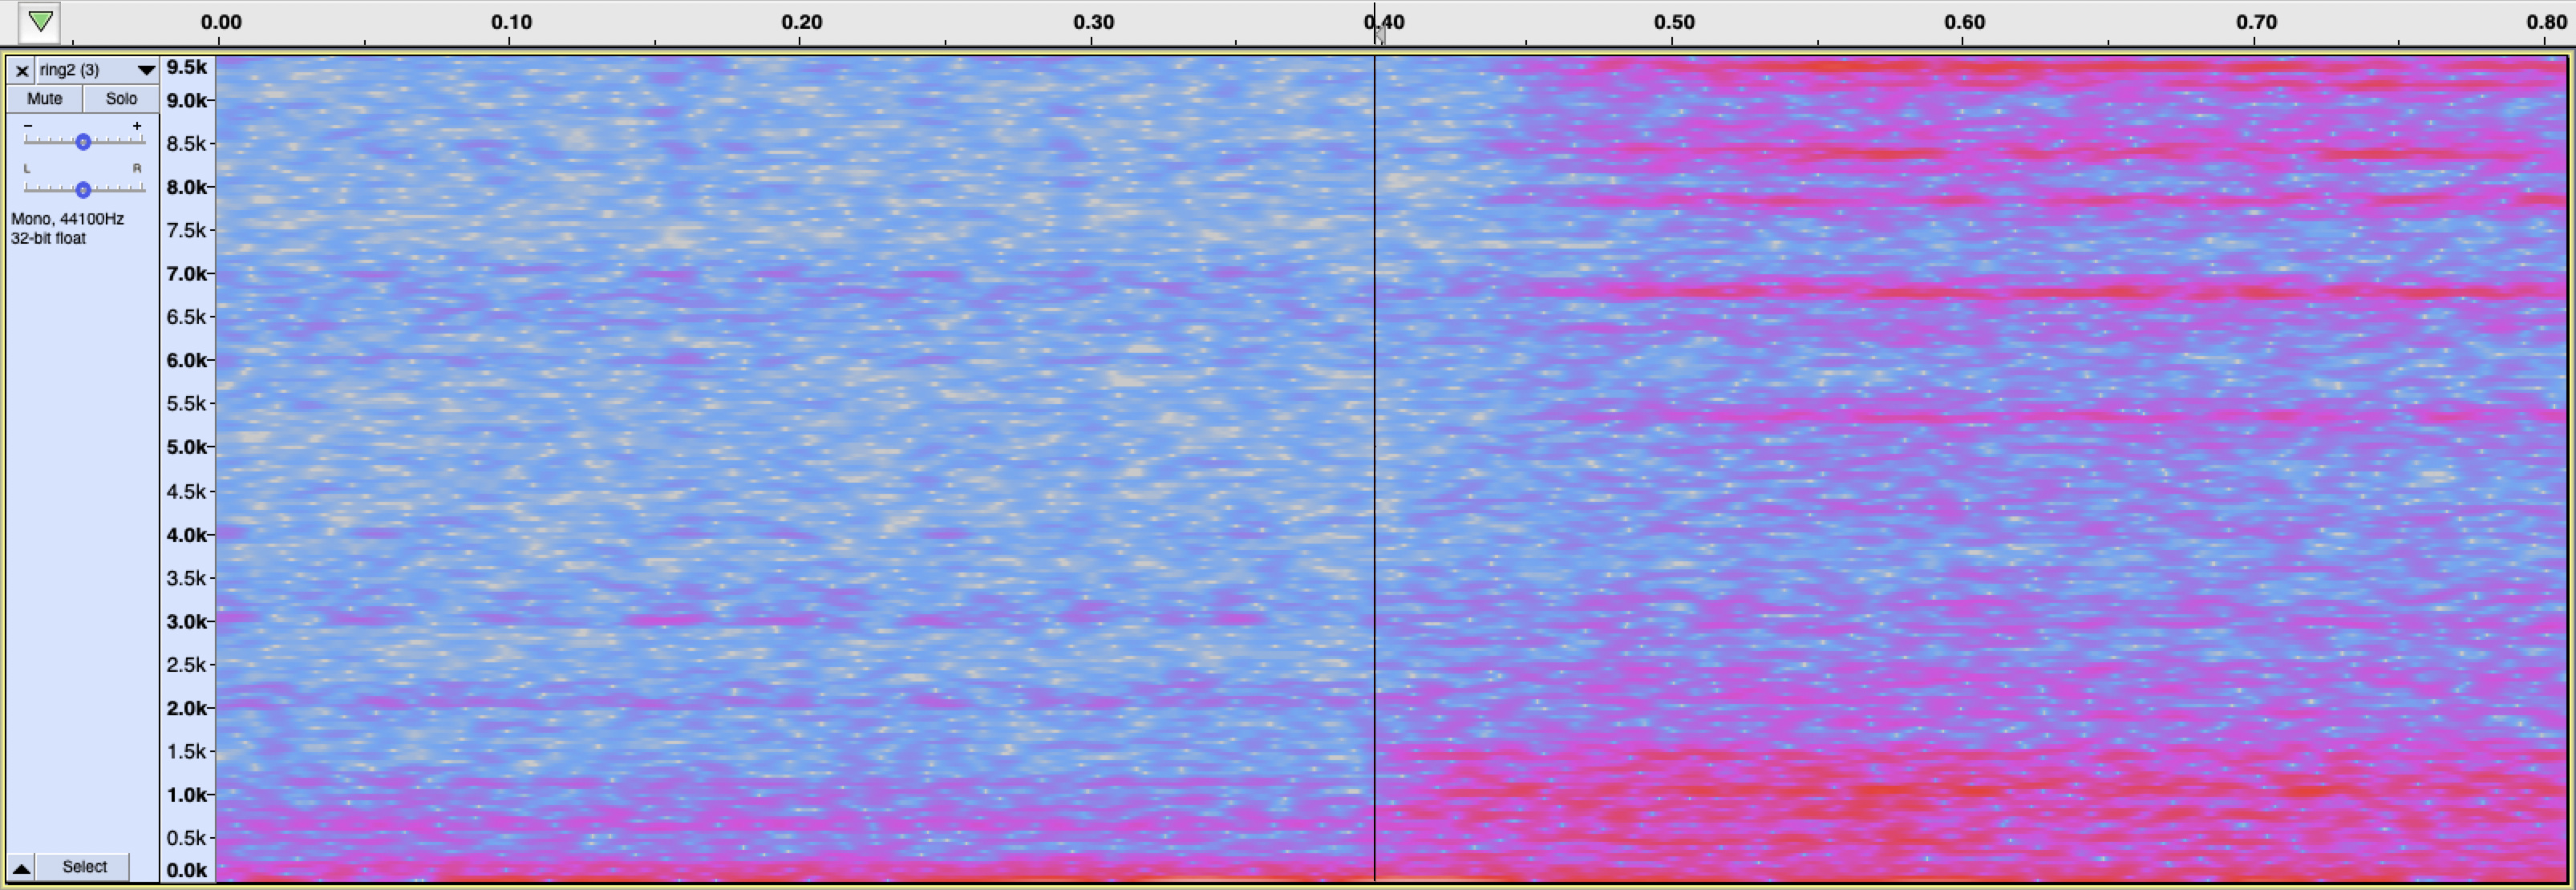
So I have cropped all my audio recordings containing ringing sounds so that they only contain the actual “ring” and not the period before or after it.

I have set

  • the window size to 100 ms and window increase to 50 ms and
  • the minimum confidence rating to 0.7
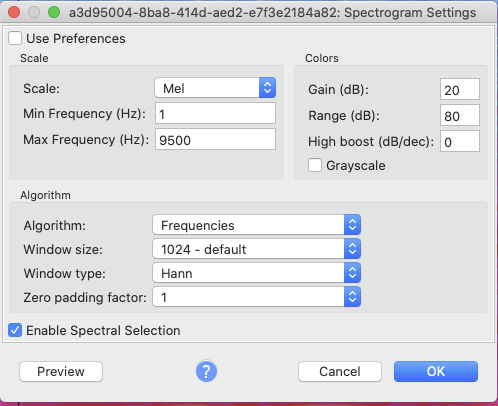
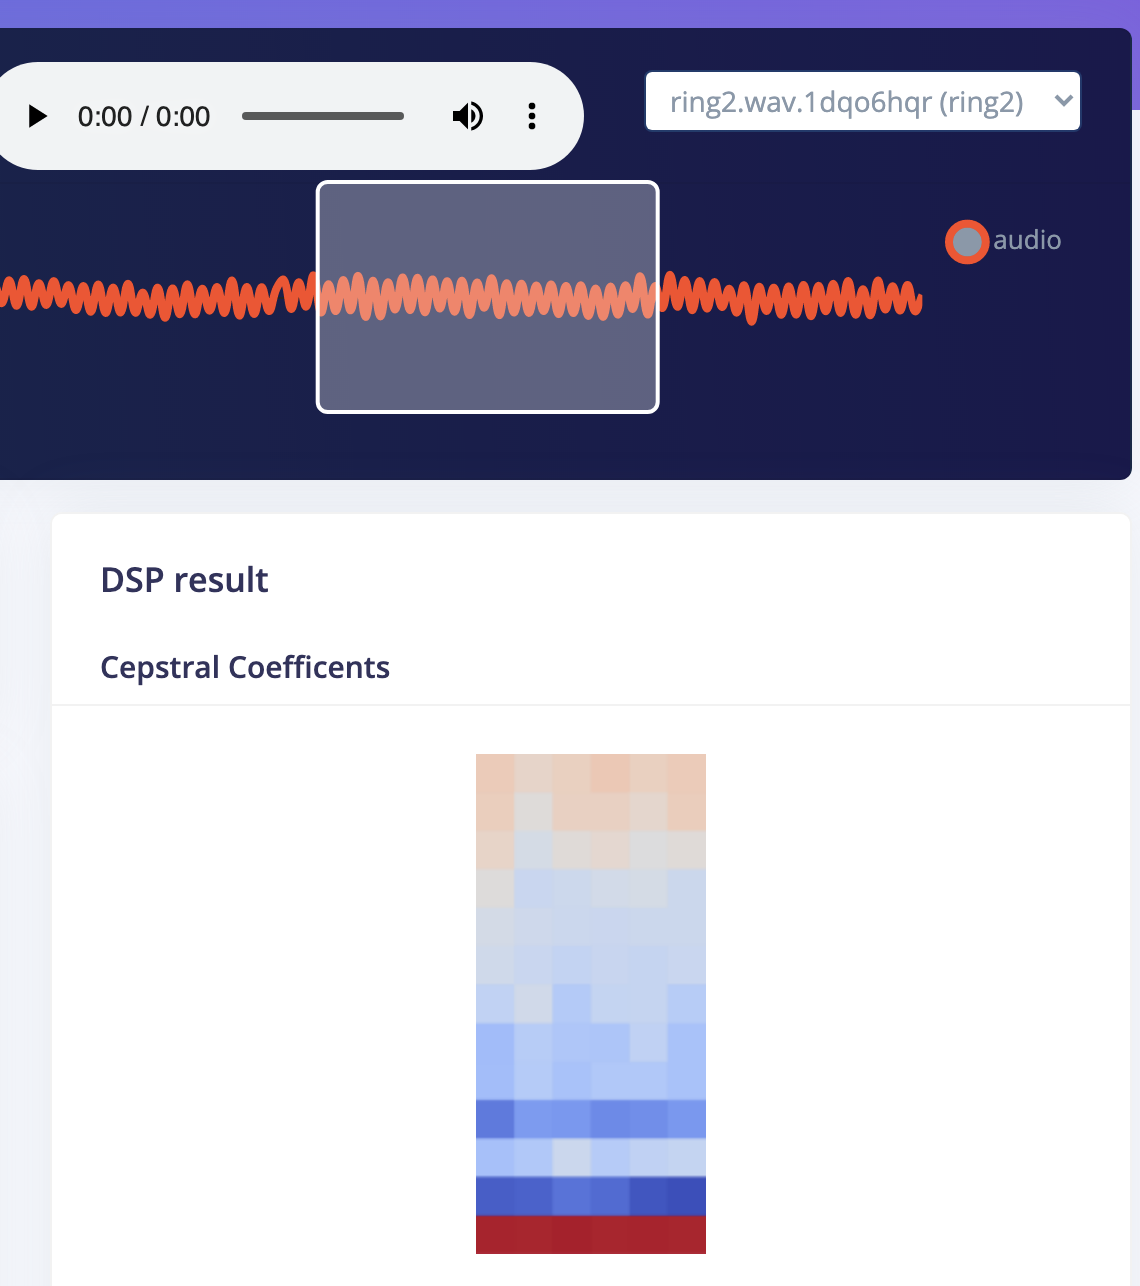
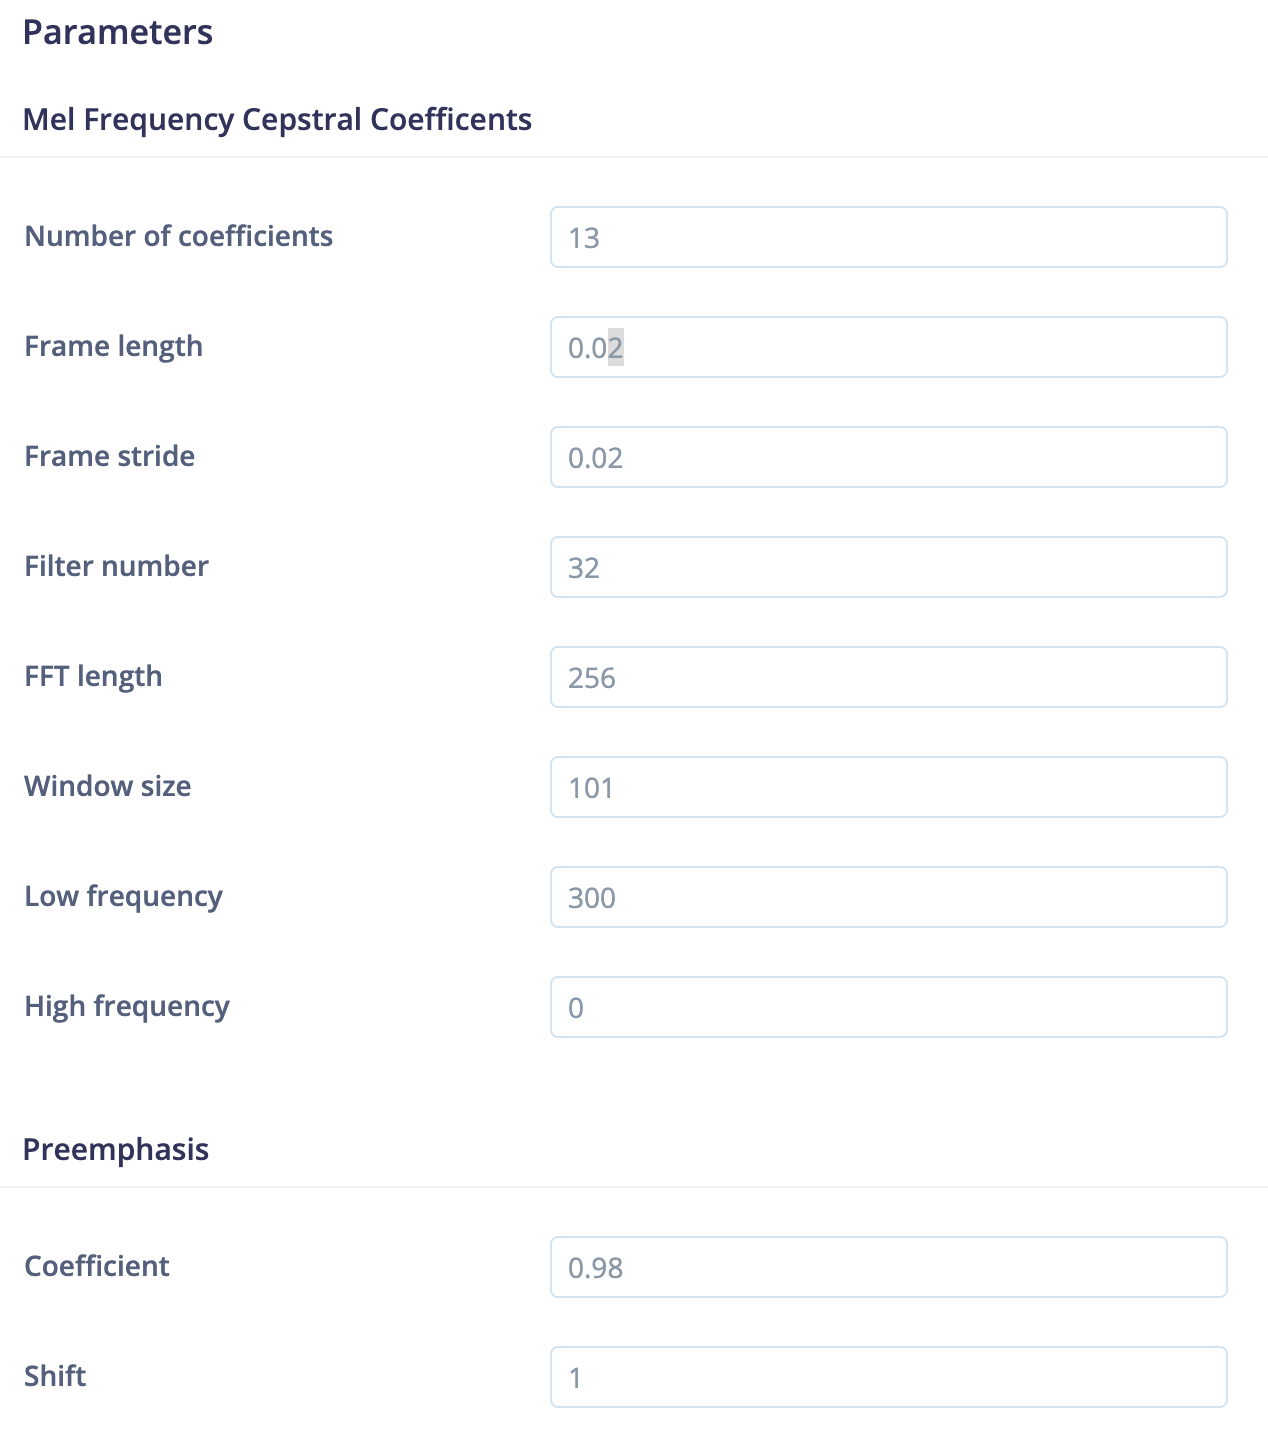
  • default settings for the MFCC parameters:

My data set is not very balanced so I have added the following to my NN architecture:

from sklearn.utils.class_weight import compute_class_weight

class_weights = dict(enumerate(compute_class_weight('balanced', np.unique(np.argmax(Y_train, axis=1)), np.argmax(Y_train, axis=1))))

...
model.fit(train_dataset, epochs=300, validation_data=validation_dataset,class_weight=class_weights, verbose=2, callbacks=callbacks)

FYI : the full definition of my NN model

import tensorflow as tf
from tensorflow.keras.models import Sequential
from tensorflow.keras.layers import Dense, InputLayer, Dropout, Conv1D, Conv2D, Flatten, Reshape, MaxPooling1D, AveragePooling2D, BatchNormalization
from tensorflow.keras.optimizers import Adam

from sklearn.utils.class_weight import compute_class_weight

class_weights = dict(enumerate(compute_class_weight('balanced', np.unique(np.argmax(Y_train, axis=1)), np.argmax(Y_train, axis=1))))

# model architecture
model = Sequential()
model.add(InputLayer(input_shape=(input_length, ), name='x_input'))
model.add(Reshape((int(input_length / 13), 13), input_shape=(input_length, )))
model.add(Conv1D(30, kernel_size=4, activation='relu'))
model.add(MaxPooling1D(pool_size=4, padding='same'))
model.add(Conv1D(10, kernel_size=1, activation='relu'))
model.add(MaxPooling1D(pool_size=1, padding='same'))
model.add(Flatten())
model.add(Dense(classes, activation='softmax', name='y_pred'))

# this controls the learning rate
opt = Adam(lr=0.00005, beta_1=0.9, beta_2=0.999)

# this controls the batch size, or you can manipulate the tf.data.Dataset objects yourself
BATCH_SIZE = 32
train_dataset, validation_dataset = set_batch_size(BATCH_SIZE, train_dataset, validation_dataset)
callbacks.append(BatchLoggerCallback(BATCH_SIZE, train_sample_count))

# train the neural network
model.compile(loss='categorical_crossentropy', optimizer=opt, metrics=['accuracy'])
model.fit(train_dataset, epochs=300, validation_data=validation_dataset,class_weight=class_weights, verbose=2, callbacks=callbacks)

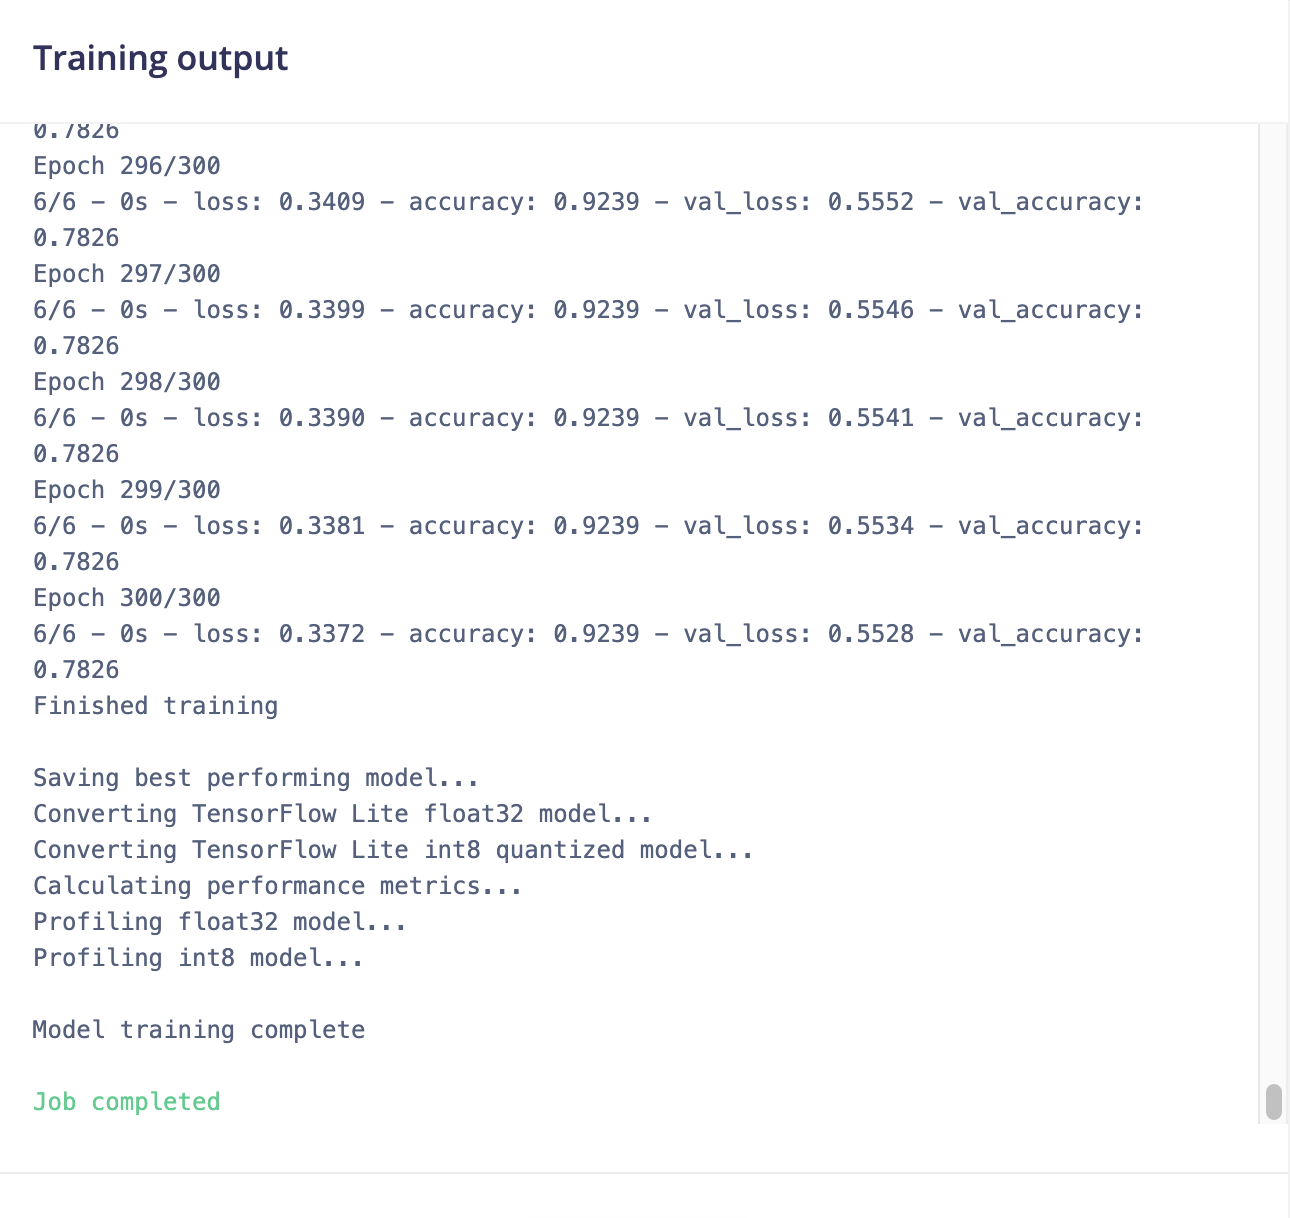
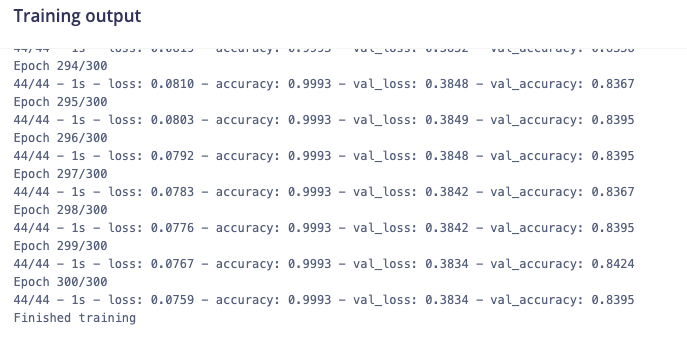
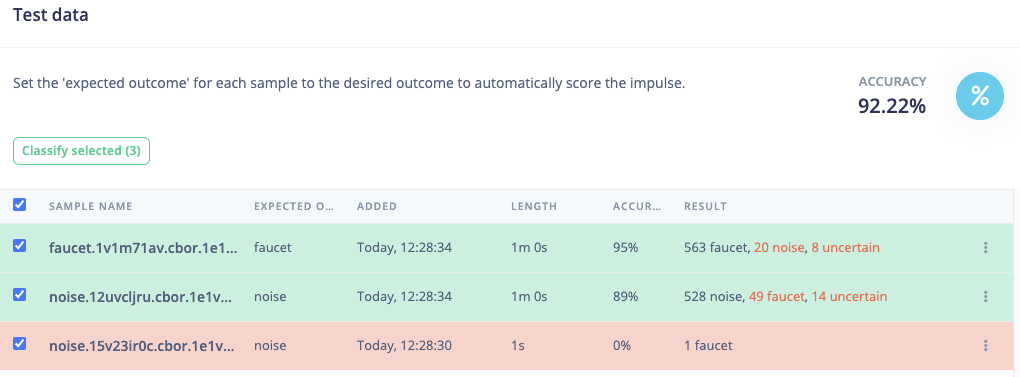
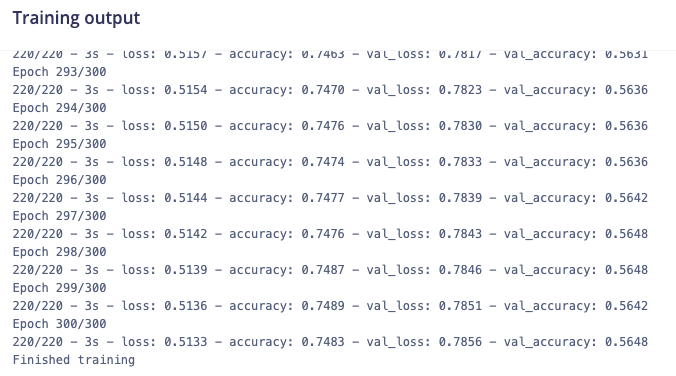
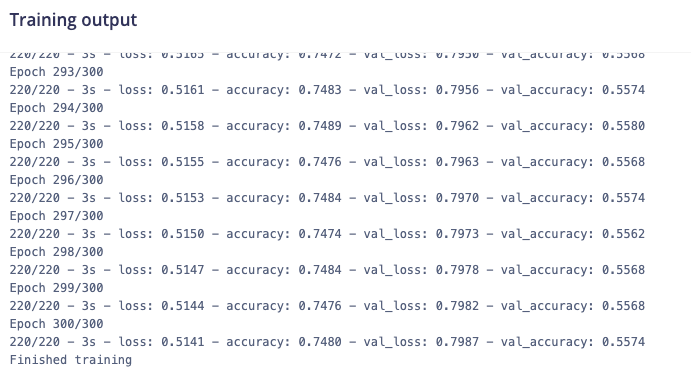
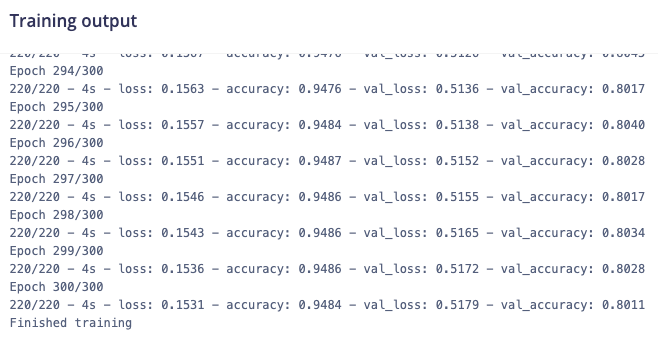
This is my training output:

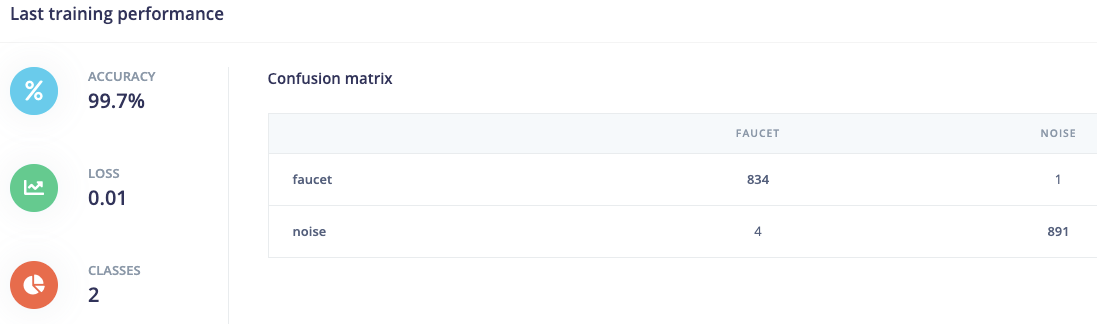
This is my training performance:

Hi @janvda,

The model is most likely underfitting because there isn’t enough training samples.
Do you think you could capture at least 1 or 2 minutes for each class? (might be a little painful with the ringing)

Then some parameters you could tune:

  • Decrease frame length and stride to have more features in the NN as mentioned by Dan in the other topic. You can try 0.005
  • Set the window increase to a lower value like 20 ms. This will increase the number of training windows

@dansitu would you have other ideas to improve the model?

1 Like

These are great suggestions, it’s always good to add more data, and having a short window increase will get more windows from the samples you have.

From your training output, I can see that the validation accuracy is lagging behind the training accuracy (0.78 vs 0.92). This is a classic sign of overfitting, meaning that your model has learned to memorize the training set, which limits its performance on unseen data.

To fix this, my top suggestions are:

  1. Add more data. This is nearly always helpful!

  2. Reduce the capacity of your network, so it can’t memorize the data as easily. You can reduce the number of filters in each conv layer, or try removing one of the layers.

  3. Add some regularization to the model. I would recommend starting by adding model.add(Dropout(0.1)) before your final dense layer. Retrain your model, and watch to see if the difference between the two accuracy readings gets smaller. You might have to train for more epochs with dropout added. You can increase the dropout rate until your validation accuracy is at an optimal level.

While you’re iterating on this, it’s worth noting that we automatically take the best model that is generated during training rather than the one that is present at the final epoch.

Thanks for the suggestions:

I have create a more balanced data set.
I have reduced window increase to 10 ms to get more samples.
I have reduced a convolution layer.

The training results are still poor:

I am still thinking that there is an issue with the MFCC feature set that is used as input for the NN.

Here some views on my feature set:

This doesn’t show any clustering for the “ring” category. It seems very random.

Maybe the issue is caused when using a window size of 100 ms with default MFCC parameters.

E.g. for the faucet training data set.
using number of training cycles =300
and minimum confidence rating = 0.70

TEST 1: window size = 100 ms / window increase = 500ms

image

TEST 2: window size = 1000 ms / window increase = 500ms

image

This is the outcome when testing on the faucet test data:

TEST 3: window size = 1000 ms / window increase = 100ms

TEST 4: window size = 100 ms / window increase = 100ms

image

TEST 5: same as TEST4 but with MFCC window size = 21 instead of 101

TEST 6: same as TEST4 but with MFCC frame stride = 0.002 instead of 0.02.

image

Some Excellent Progress !

Based on the testing I did with the faucet dataset, I adapted “my doorbell” Impulse design as follows:

  1. window size = 100 ms (same as before)
  2. window increase = 1 ms (instead of 500 ms) => I have lowered this to give sufficient samples to test
  3. MFCC Frame stride = 0.002 (instead of 0.02) => this will give 520 features as input.
  4. NN : number of training cycles = 300 (allthough I reached 1.00 much earlier)
  5. Minimum confidence rating = 0.70

The outcome of training:

Model Testing (I still need to add some ring samples):

I have extended my training set and increased “window increase” from 1 to 2 ms.

Model testing outcome:

Hi @janvda,

Thanks for sharing your different test results, it’s great to see you reached a high accuracy and this is also a valuable information for our users. Keep us posted!

Aurelien

1 Like