Hi,
I am doing audio recognition project and I collect the audio samples for Training and Testing stage which shows good percentage result for both stages. When i played back the audio samples, the voice can be heard loudly, which i understand that the IC can capture my voice even when i stood at 5m from the IC.
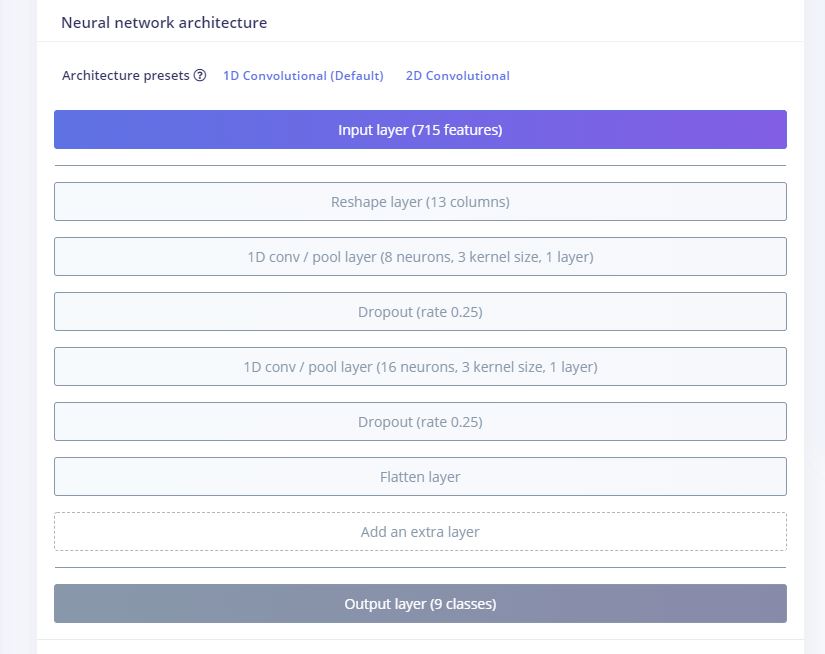
For the setting in the Impulse Design section (Create impulse, MFCC and NN classifier), i just follow all the default and suggested setting.
But when the code generated and i upload the code into the processor of the Nano 33 BLE Sense and do the offline audio recognition testing, the accuracy results are bad, which are mostly reach only around 0.332.
Does the issue actually related to the sensitivity of the Nano 33 BLE Sense IC?
I had try to change the PDM.setGain value from 127 to 255 in the code as suggested in a website, but it doesnt work.
I am new in using this IC and also writing code. I need your advices regarding on how and where i need to do the modification in the code or in the Edge Impulse setting so that i can achieve high accuracy at least 0.80.
Your opinion and advice regarding this issue is highly appreciated.
Thank you, have a nice day.
Hi @asmayusof,
Can you share your project ID? I’d like to take a look at the data you collected and see if I can replicate the issue on my Nano 33 BLE Sense.
Hi @shawn_edgeimpulse ,
Thank you for your response.
The project ID is 109691.
For the data samples, I collected for the duration of 1s but there are some of the sample data collected are consist more than 1s because the samples consist of 2 words. That is why i set the window size is 1100ms and window increase is 550ms.
Hi @asmayusof,
I tried your project with some success. It heard me say “stop” and “turn left,” but it missed me saying “start.” There were also some false negatives (“forward” and a second “stop.”).
It looks like you only have about 100 samples per class. In my experience, you need a lot more than this to get a robust model (i.e. one that works well in the field). I usually aim for around 1500 samples per class, where each sample has a variety of pronunciations, pitches, distances from the microphone, background noises, etc. I highly recommend checking out my data augmentation script (https://github.com/ShawnHymel/ei-keyword-spotting) to see how I’ve been able to make decent keyword spotting systems that work well in the field.
1 Like
Hi @shawn_edgeimpulse,
Thank you for your opinion and suggestions.
I really appreciate it.
-
Previously, I tried to collect more data. But, I could not collect more than 20 minutes of total samples for all words. If i want to collect 1500 samples for each words, then what i need to do in order to get an access to have more space to collect more samples?
-
For the setting of layers, neurons, kernel, droupout rate, etc. of the 1D convolutional at NN architecture section, does all the values used are fixed value as theoritically? If i want to try make some changes regarding the number of layers, kernels or anything, does it have like a specific frame of 1D convolutional NN architecture or range of values that i need to follow? or it can be simply changed?
-
I want to ask your opinion regarding one matter. If I have run out of time to obtain and collect a large number of voice samples for all words (1500 samples per word), can I just copy and paste the existing audio samples until each word has 1500 samples? The existed samples were already taken at different distances and different intonations. It is possible to do that?
Your opinion and advice is highly appreciated.
Thank you, have a nice day.
Hello everyone.
Firstly, i would like to apologize for the long silent without any reply as a lot of things happen on my side.
Thank you for the suggestions and i do appreciate it.
There are some parts that i need your help to explain in order to understand the whole process better.
-
From the picture that attached previously on Neural Network architecture, may i know the reason on why the platform set to have 1D convolutional layer for 2 times? As we can see in the picture, there is 1D CNN, followed by the dropout rate, and then there is another 1D CNN layer. Hope you can explain about this matter.
-
Since i am still learning about the ML, i am curious about the term ‘parameter’ and ‘hyperparameter’ used in training the ML. Does the hyperparameter here refer to the number epoch and 1D CNN layer? Is there any other setting that are considered as hyperparameter?
Then, how about the parameter setting? Which part are consider as parameter?
-
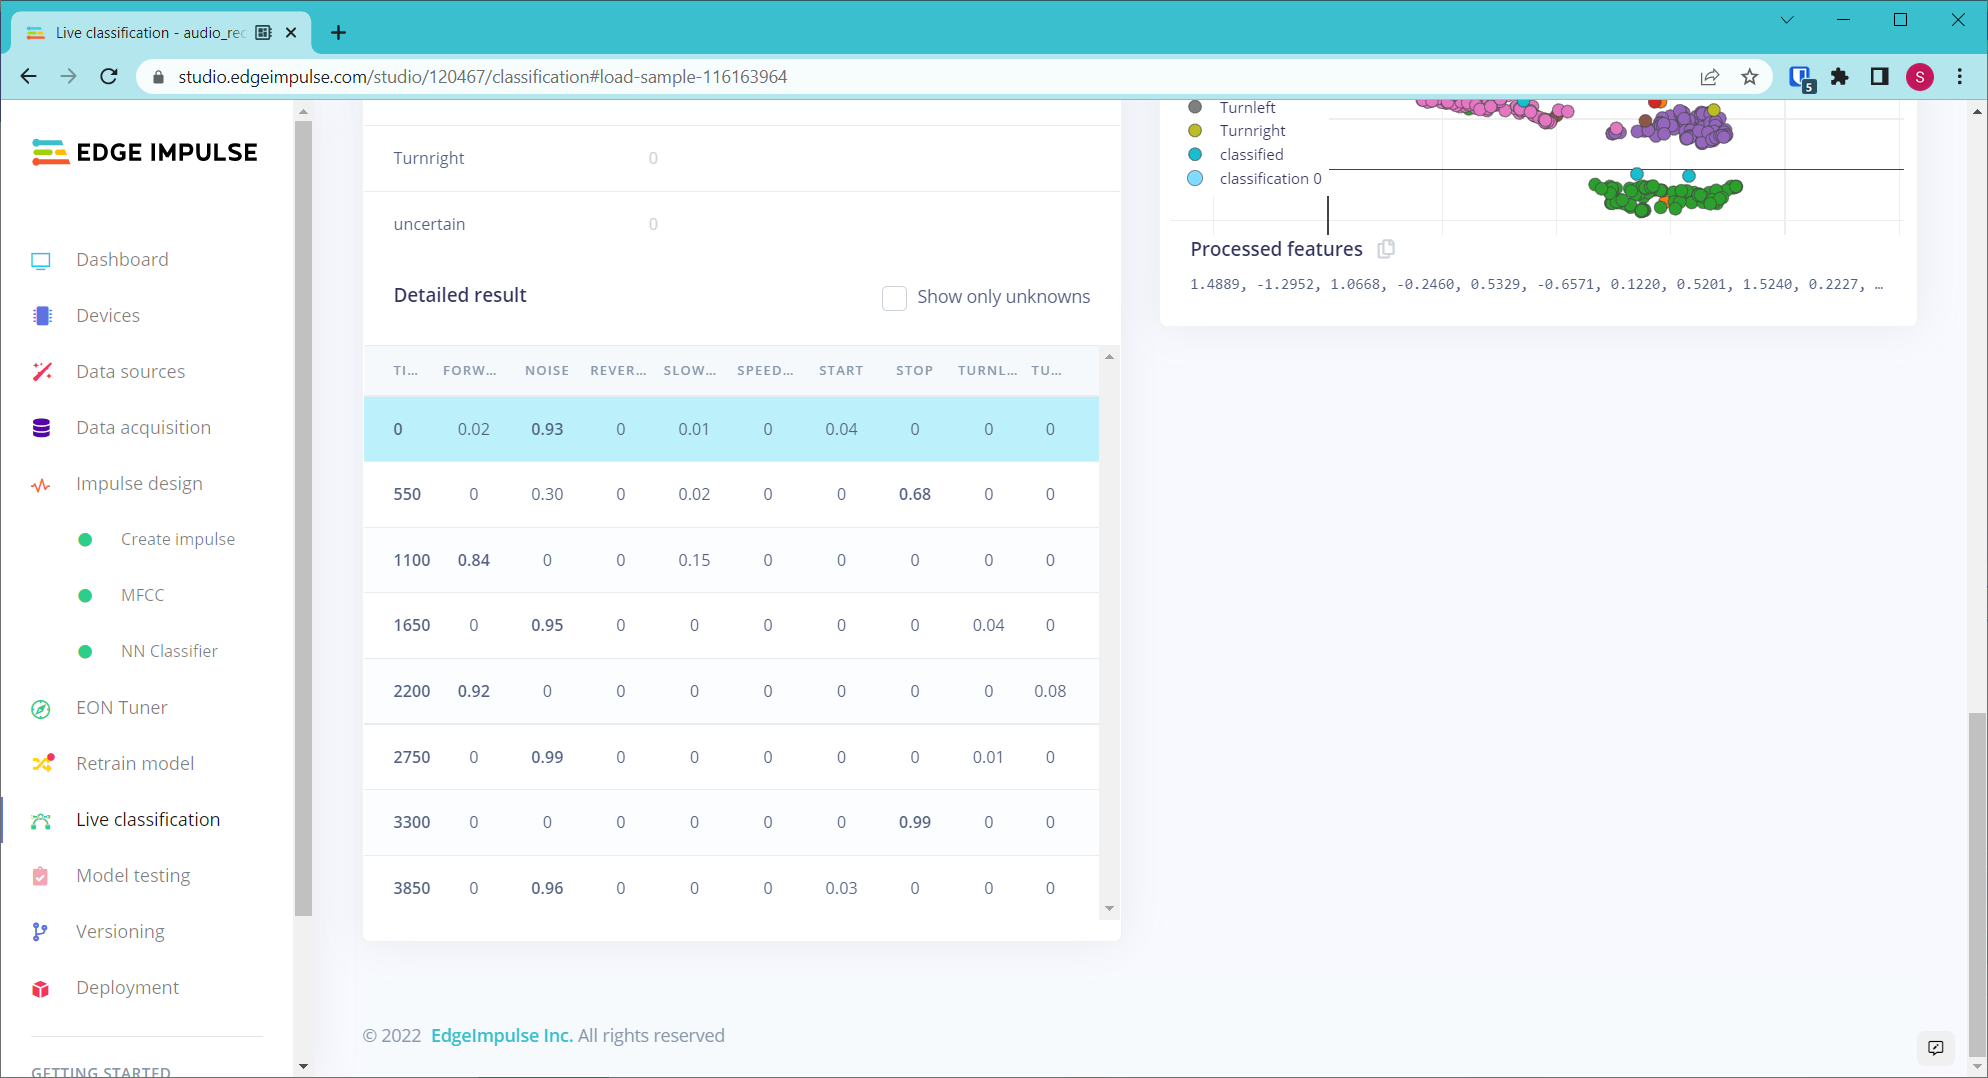
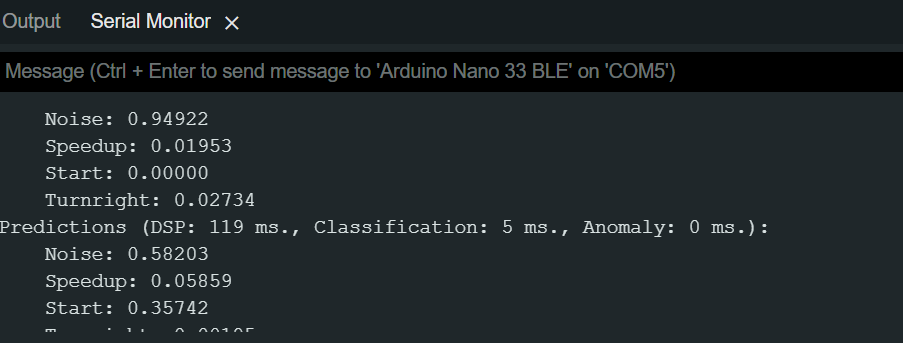
When i uploaded the generated source code which contain the trained impulse into the device, and start given the command, the reading shows in the serial monitor, which i assume as the confidence level. May i know how the confidence level is calculated after the command was given to the device ?
Your opinion and advice are highly appreciated.
Thank you, have a nice day.