Question/Issue:
Hello!
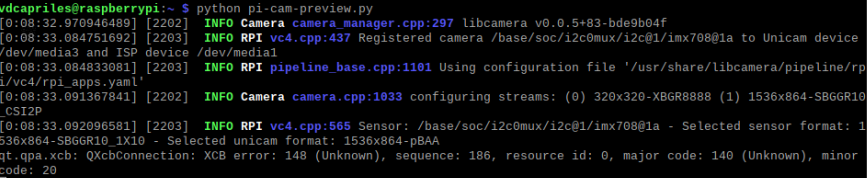
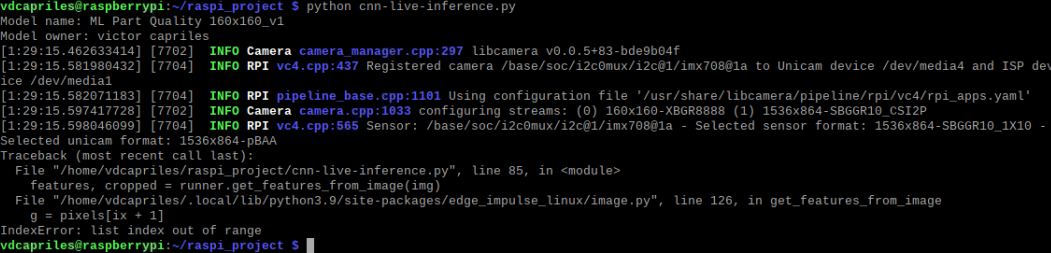
I have downloaded the Linux (AARCH64) file after the model was built and Im using as a guide, the code in the github repository https://github.com/ShawnHymel/computer-vision-with-embedded-machine-learning/blob/master/2.5.1%20-%20Project%20-%20Live%20CNN%20Inference/Raspberry%20Pi/cnn-live-inference.py to deploy my model in the Raspberry Pi4 with the Pi camera module3. However, i got the following error
I have installed all the dependecies:
"pip3 install edge_impulse_linux -i https://pypi.python.org/simple" &
“sudo apt-get install libatlas-base-dev libportaudio0 libportaudio2 libportaudiocpp0 portaudio19-dev”
Additionally, im not using the camera legacy mode.
Project ID: 216037
Context/Use case:
Currently the code looks like this:
#!/usr/bin/env python
“”"
Pi Camera Live Image Classification
Detects objects in continuous stream of images from Pi Camera. Use Edge Impulse
Runner and downloaded .eim model file to perform inference. Bounding box info is
drawn on top of detected objects along with framerate (FPS) in top-left corner.
Author: EdgeImpulse, Inc.
Date: August 3, 2021
Updated: August 9, 2023
License: Apache-2.0 (apache.org/licenses/LICENSE-2.0)
“”"
import os, sys, time
import cv2
from picamera2 import Picamera2
from edge_impulse_linux.image import ImageImpulseRunner
Settings
model_file = “ml-part-quality-160x160_v1-linux-aarch64-v15.eim” # Trained ML model from Edge Impulse
res_width = 160 # Resolution of camera (width)
res_height = 160 # Resolution of camera (height)
rotation = 0 # Camera rotation (0, 90, 180, or 270)
The ImpulseRunner module will attempt to load files relative to its location, so we make it load files relative to this program instead
dir_path = os.path.dirname(os.path.realpath(file))
model_path = os.path.join(dir_path, model_file)
Load the model file
runner = ImageImpulseRunner(model_path)
Initialize model (and print information if it loads)
try:
model_info = runner.init()
print(“Model name:”, model_info[‘project’][‘name’])
print(“Model owner:”, model_info[‘project’][‘owner’])
Exit if we cannot initialize the model
except Exception as e:
print(“ERROR: Could not initialize model”)
print(“Exception:”, e)
if (runner):
runner.stop()
sys.exit(1)
Initial framerate value
fps = 0
Interface with camera
with Picamera2() as camera:
# Configure camera settings
config = camera.create_video_configuration(main={"size": (res_width, res_height)})
camera.configure(config)
# Start camera
camera.start()
# Continuously capture frames
while True:
# Get timestamp for calculating actual framerate
timestamp = cv2.getTickCount()
# Get array that represents the image (in RGB format)
img = camera.capture_array()
# Rotate image
if rotation == 0:
pass
elif rotation == 90:
img = cv2.rotate(img, cv2.ROTATE_90_CLOCKWISE)
elif rotation == 180:
img = cv2.rotate(img, cv2.ROTATE_180)
elif rotation == 270:
img = cv2.rotate(img, cv2.ROTATE_90_COUNTERCLOCKWISE)
else:
print("ERROR: rotation not supported. Must be 0, 90, 180, or 270.")
break
# Extract features (e.g. grayscale image as a 2D array)
features, cropped = runner.get_features_from_image(img)
# Perform inference
res = None
try:
res = runner.classify(features)
except Exception as e:
print("ERROR: Could not perform inference")
print("Exception:", e)
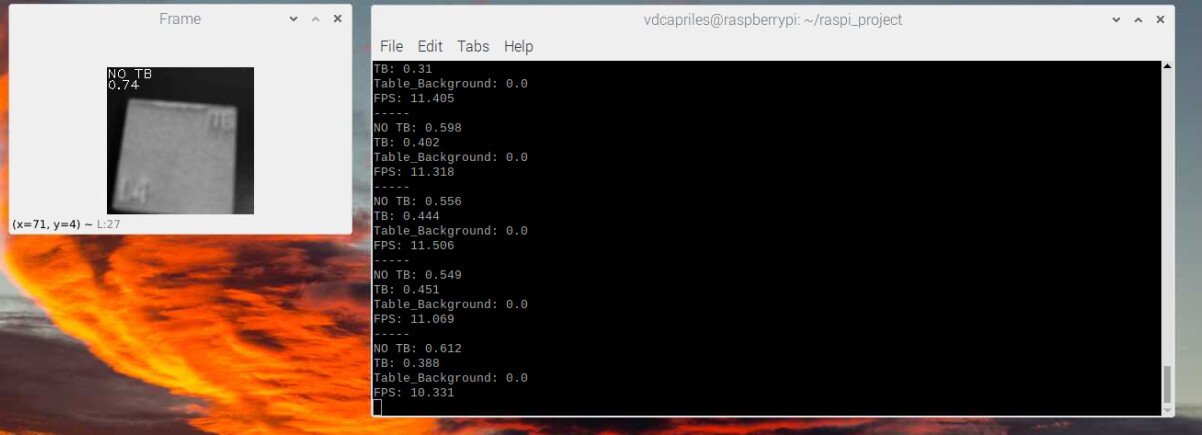
# Display predictions and timing data
print("-----")
results = res['result']['classification']
for label in results:
prob = results[label]
print(label + ": " + str(round(prob, 3)))
print("FPS: " + str(round(fps, 3)))
# Find label with the highest probability
max_label = max(results, key=results.get)
# For viewing, convert image to grayscale
img = cv2.cvtColor(img, cv2.COLOR_RGB2GRAY)
# Draw max label on preview window
cv2.putText(img,
max_label,
(0, 12),
cv2.FONT_HERSHEY_PLAIN,
1,
(255, 255, 255))
# Draw max probability on preview window
cv2.putText(img,
str(round(results[max_label], 2)),
(0, 24),
cv2.FONT_HERSHEY_PLAIN,
1,
(255, 255, 255))
# Show the frame
cv2.imshow("Frame", img)
# Calculate framrate
frame_time = (cv2.getTickCount() - timestamp) / cv2.getTickFrequency()
fps = 1 / frame_time
# Press 'q' to quit
if cv2.waitKey(1) == ord('q'):
break
Clean up
cv2.destroyAllWindows()
Am I missing something? I would really appreciate it if I could get some help.